thermal_evaporator
Thermal Evaporator: Standard Operating Procedure
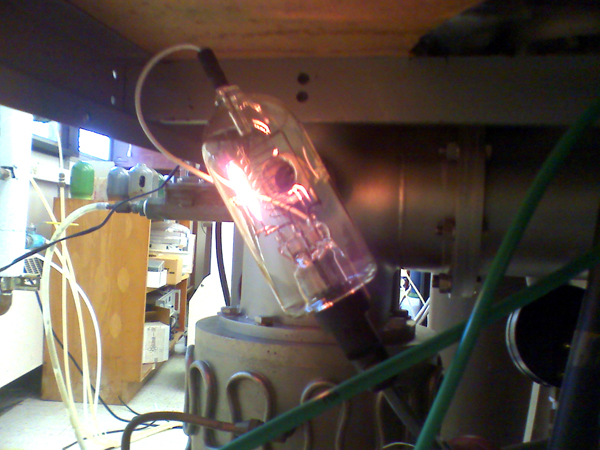
Starting the Diffusion Pump
- Make sure the water to the diffusion pump is on
- If you need to open the water valve, open the return before the entry valve to prevent high pressure in the line.
- Turn on the power to the surge protectors
- Make sure the mechanical pump is on
- Make sure all valves are closed
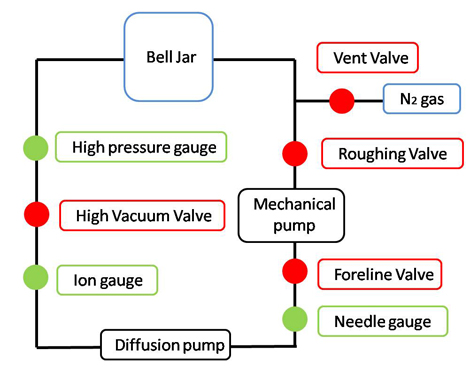
- Open the foreline valve to back the diff pump
- flip on the power switch to the diff pump on the front panel
- Sometimes the power does not come on because of the water flow safety switch, even if the water is on. You may need to jiggle the switch
- Wait a few hours for the oil to heat up and the pressure to drop
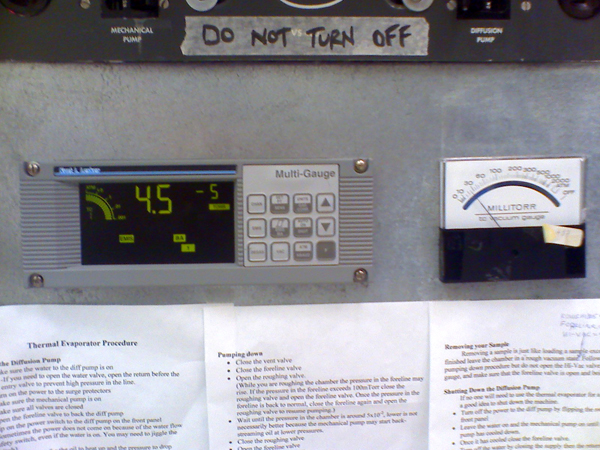
- Turn on the emission current for the ion gauge. If the pressure reads around 10-6 Torr the machine is ready.
Loading a Sample
- Make sure the high vacuum valve and the roughing valve are closed
- Open the vent valve
- Open the tank of nitrogen gas attached to the vent. The nitrogen is used to speed up the venting process.
- Wait until you see that the bell jar seal has been broken or the pressure in the chamber has reached 760 torr.
- Close vent so nitrogen doesn't leak into room
- Lift the bell jar by using the switch on the front panel
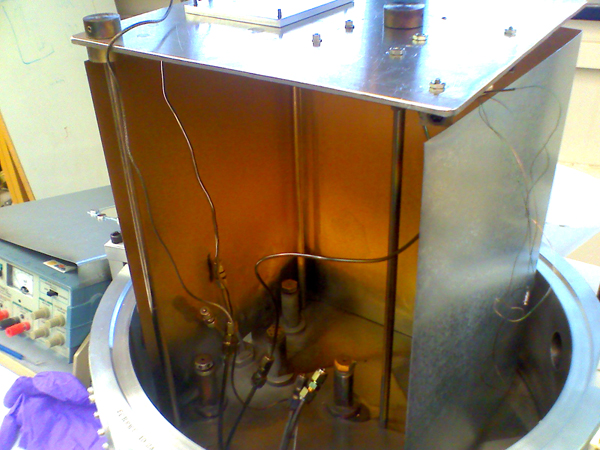
- Remove sheet metal faceplate to reveal sample holder & boat electrodes
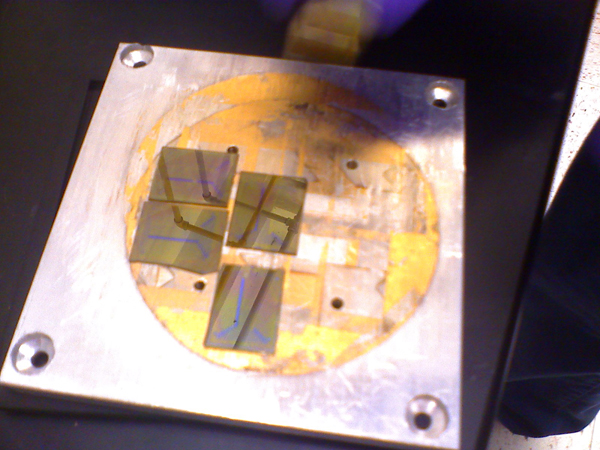
- Tape chips to sample plate with double sided kapton tape
- put tape on back of chips first, then put them on plate
- Load sample plate into the plate stage in the thermal evaporator
- Chip faces should point toward boats
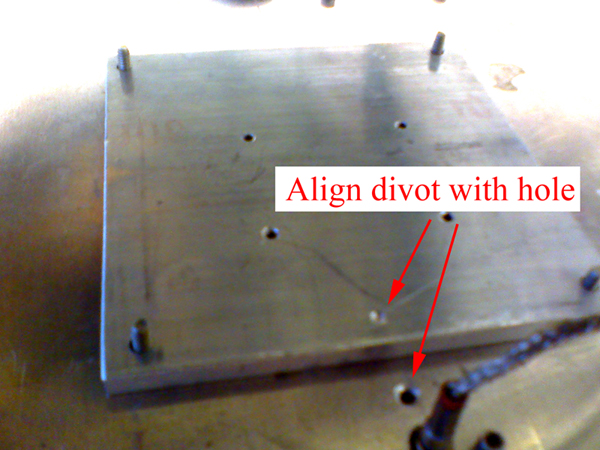
- Line up divots between sample plate & plate stage
- Check that boat power supplies are off
- Load boats & rods
- Note which electrode numbers you're loading the boats into
- Put ends of boats & rods onto different washers to ensure that thickness differences don't cause looseness
- Put sheet metal plate back on
- Power on & test that the shutter mechanism is working. Then power it off.
- Lower the bell jar and take care that the jar is seated properly
Pumping down
- Close the vent valve
- Close the foreline valve
- Open the roughing valve.
- Important: mechanical pump should never pump with the foreline & roughing valves both open
- While you are roughing the chamber the pressure in the foreline may rise. If the pressure in the foreline (needle gauge) exceeds 100mTorr close the roughing valve and open the foreline valve. Once the pressure in the foreline is back to normal, close the foreline valve again and open the roughing valve to resume pumping.
- Wait until the pressure in the chamber is around 5×10⁻² Torr
- Important: don't overpump because the mechanical pump will start back-streaming oil at lower pressures. This is damaging!
- Important: don't walk away & forget you're pumping!
- Close the roughing valve
- Open the foreline valve
- Turn off the ion gauge, if on
- Change channel on pressure display to channel 1
- press ems to turn off/on
- Pour liquid nitrogen into funnel behind the bell jar
- liquid nitrogen can be bought from chem stores
- put on gloves
- put hose in copper dewar
- open 'garden hose' valve
- open 'door handle' valve
- be prepared for loud noise & lots of fog
- dewar is full when you see liquid splashing out
- it takes a long time to fill
- turn off handle & valve
- pay for it!
- Slowly open the High Vacuum valve making sure not to let the foreline pressure go above 100 mTorr
- After the high vacuum valve has been completely opened, wait 5 minutes then turn on the ion gauge
- go to pressure display channel 1
- press ems to turn off/on
- Note: Don't let the ion gauge be turned on when the pressure is greater than 10-4 Torr
- If you think there's a problem with the ion gauge press 'degas' no pressure display channel 1. This will try to evaporate contaminants out of the gauge. Turn off 'degas' before continuing.
- Wait until the pressure in the chamber has reached about 10-6 Torr
- 3×10⁻⁶ Torr is acceptable, 7×10⁻⁶ Torr is the upper limit
- This takes between 0.5 - 1 hour
Metal deposition
- Turn on the water supply to the boat electrodes, first the return then the supply
- More recently, the water is always left on
- Program in the correct density and Z-factor into the film thickness gauge. You may have to do this more than once if you have more than one metal.
- Press menu twice
- Enter the density and Z-factor (Values in notebook by monitor)
- Set tooling = 100
- Press menu twice to return
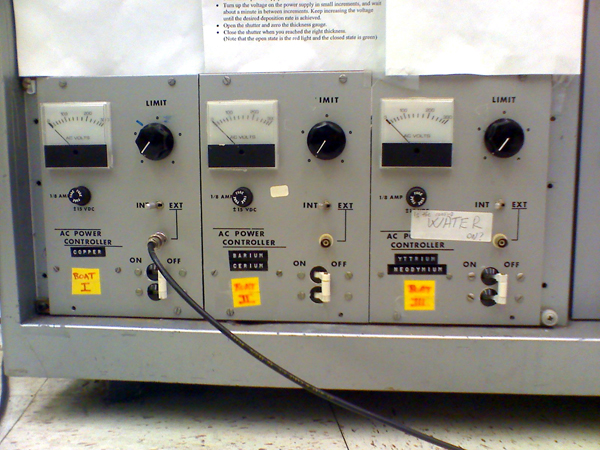
- Turn on the power supply to the boat
- Turn up the voltage on the power supply in small increments, and wait about a minute in between increments. Keep increasing the voltage until the desired deposition rate is achieved.
- Good deposition rate = 1 Angstrom per second
- Expect the pressure to go up. After the evaporation the pressure should actually drop below the value when you started.
- Turn on power to shutter mechanism
- Acting quickly, open the shutter and press 'zero' to zero the thickness gauge.
- red light means shutter is open, green light means it's closed
- Close the shutter when you've reached the right thickness.
- Standard thicknesses: 5 nm Cr, followed by 30 nm Au.
- Turn off shutter power
- When finished slowly turn down power to boat
- Rate: 10 Volts per second
- Turn off power to boat
Removing your Sample
Removing a sample is just like loading a sample except when you are finished leave the chamber in a rough vacuum state.
- Close high vacuum valve
- Turn off ion gauge
- Open nitrogen gas
- Slowly open vent valve
- Open bell jar & remove samples & boats
- Careful, insides are hot
- Au boat & chromium rods are reusable so save them
- When removing samples from sample tray do not try to pry them up (like pancakes). The kapton tape is very sticky & this often ends in snapped chips. Instead, apply torque at one corner of the chip (trying to rotate them in the plane of the sample tray). Once they've rotated a little the influence of the kapton tape is reduced & they can be picked up (like pancakes) with no danger.
- Close bell jar
- Close foreline valve
- Open roughing valve
- At 5×10⁻² Torr close roughing valve & open foreline valve
Shutting Down the Diffusion Pump
If no one will need to use the thermal evaporator for a while it maybe a good idea to shut down the machine.
- Turn off the power to the diff pump by flipping the switch on the front panel
- Leave the water on and the mechanical pump on until the diffusion pump has cooled down.
- Once it has cooled close the foreline valve.
- Turn off the water by closing the supply then the return
- Turn off the power on the surge protectors, this will turn everything off.
thermal_evaporator.txt · Last modified: 2019/09/09 21:28 by ethanminot

